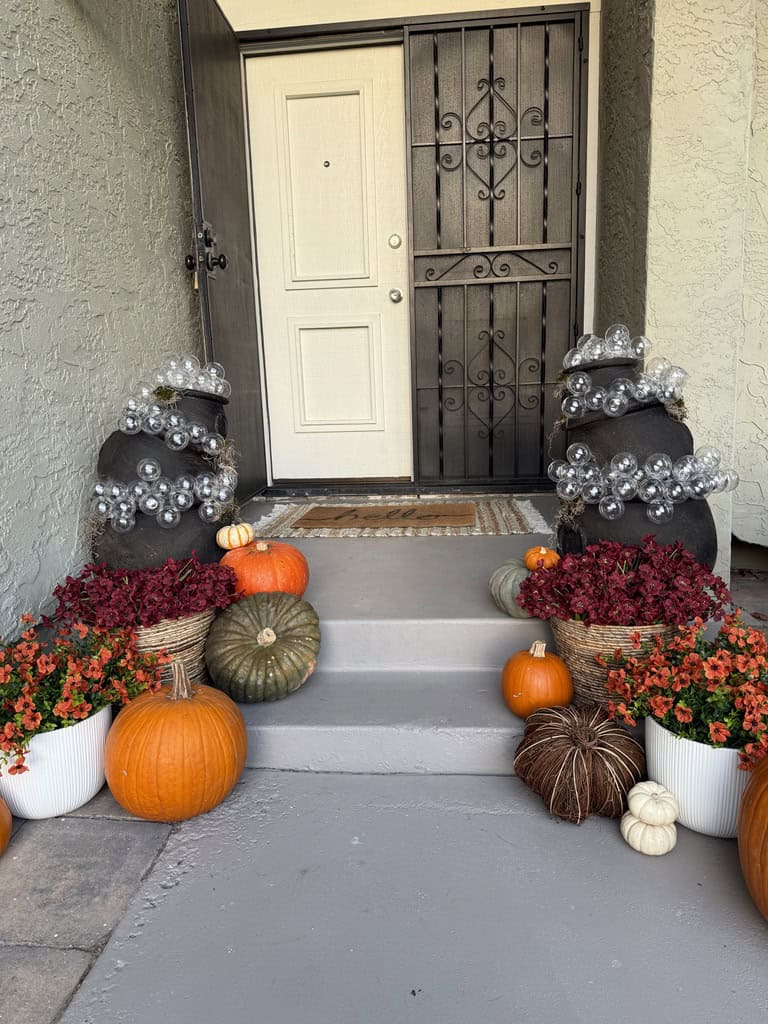
Our front porch is one of my favorite spots to decorate for any holiday, and I couldn’t resist a diy bubbling cauldron for Halloween! This is such an easy way to add some witchy fun to your decor.
This easy project mostly requires patience as you wait for the cauldrons to dry between steps and time when hot gluing. Follow the steps below, and you’ll have a festive Halloween decoration you can use for years to come!
Supplies:
- plastic cauldrons in multiple sizes (I used this set of 8, 12, and 16″ cauldrons)
- wall texture spray (orange peel)
- matte or flat black spray paint (Rust-Oleum is my favorite)
- hot glue gun & glue sticks
- clear plastic ornaments
- fake moss in different styles
How to Age Your Cauldron the Easy Way
The plastic cauldrons are a great base, but I wanted mine to look aged, like cast iron cauldrons that had been bubbling away for centuries. I sprayed them liberally with orange peel wall texture spray. After it dried, I went over some spots again for extra grit.
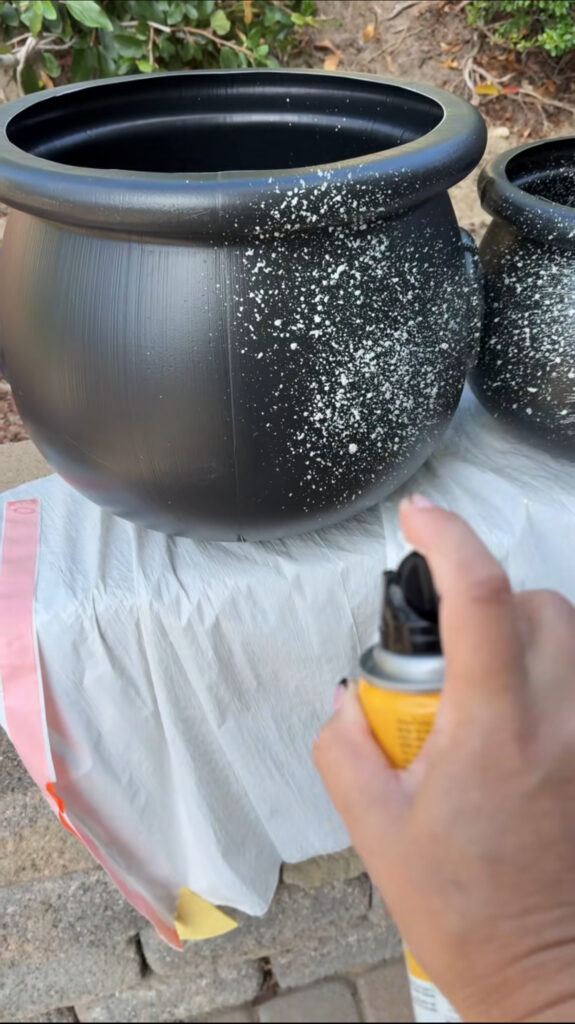
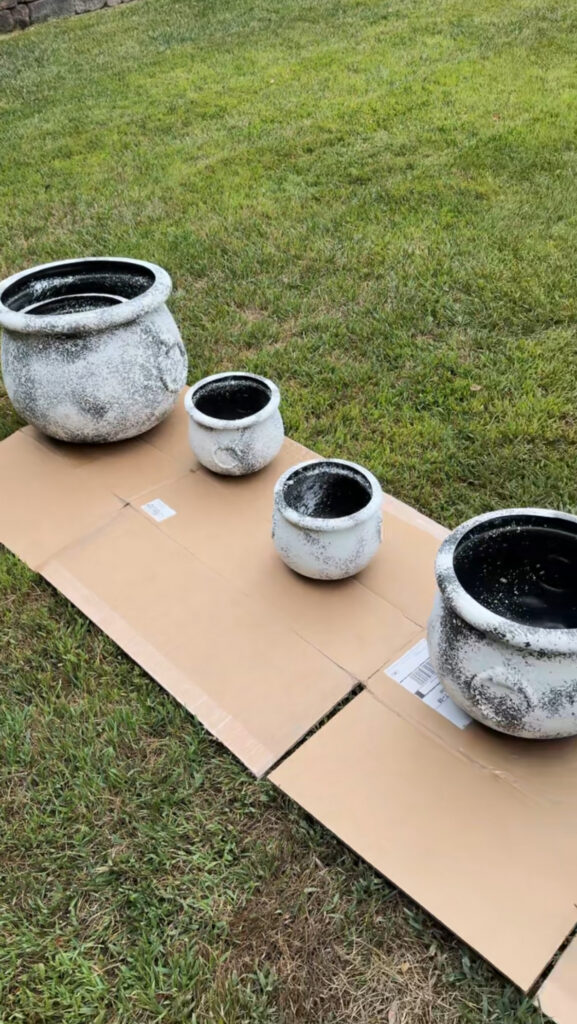
Once the texture spray was completely dry, I spray-painted the whole thing black using flat black Rust-Oleum spray paint. Multiple light coats will dry faster and result in fewer drips.
Side note: if you have a project that requires a decent amount of spray painting, I highly recommend this spray paint trigger handle. It’s so much more comfortable than holding down the nozzle on the paint can.
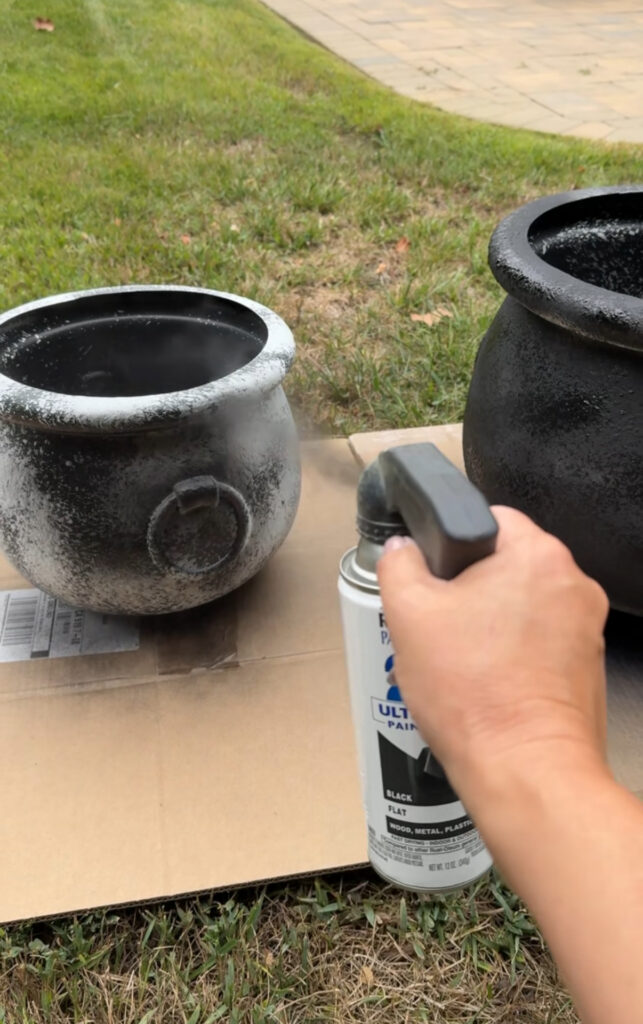
When your cauldrons are painted and dry, you can add a little extra detail by rubbing dirt over the surface. Just grab a handful of dirt from your garden or yard and smear it on. Then brush off the excess and let it dry in the sun.
Stack Your Cauldrons
Now that your cauldrons no longer look brand new, the next step is to stack them. To give them stability and make the next step easier, it’s a good idea to fill each cauldron with cardboard or paper.
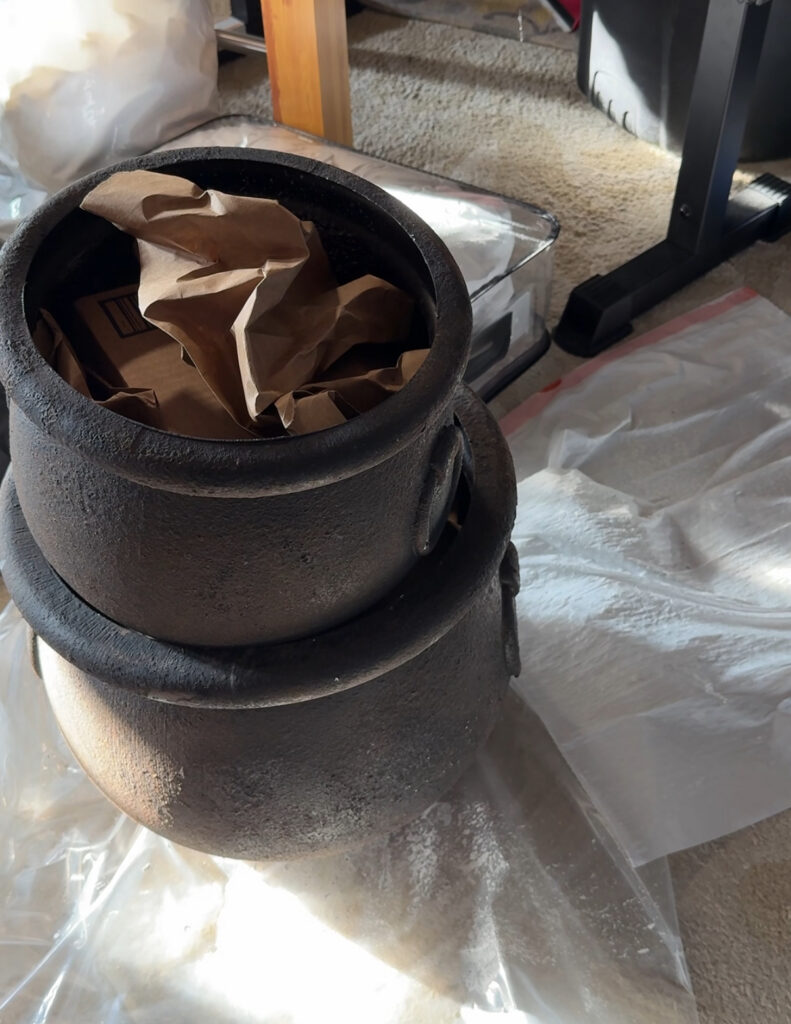
You can use whatever you have on hand. I used a combination of delivery boxes and paper grocery bags. You don’t need to fill the entire cauldron. You’re just creating a base for the next cauldron and the bubbles to rest on.
I stacked my cauldrons a little lopsided for a more natural look, then used hot glue at the connection points to help keep them stable.
Adding Bubbles to Your DIY Cauldron
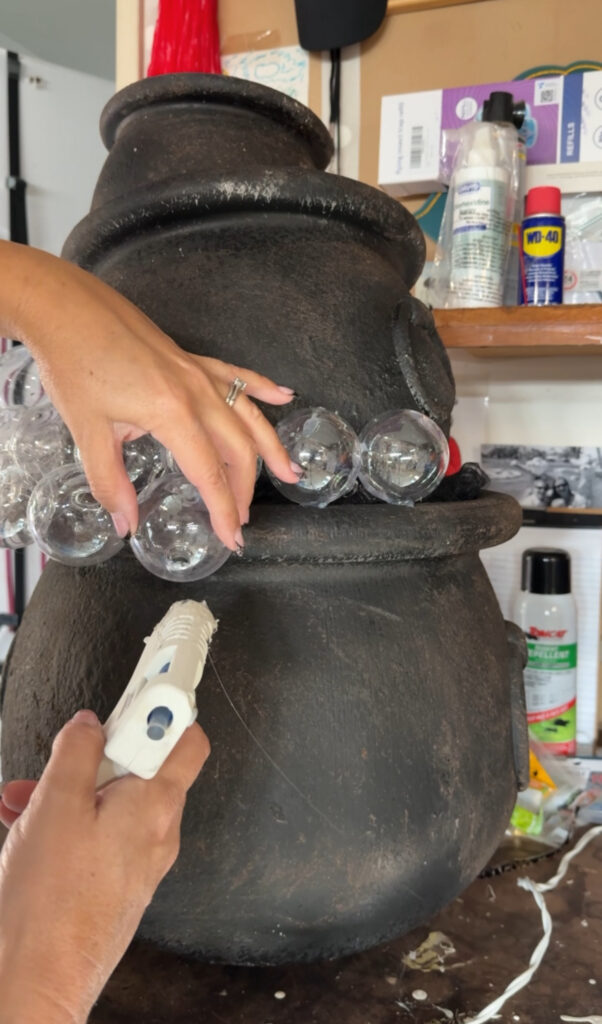
Next, it’s time to use the clear ornaments to add the bubble effect. Remove the little metal piece and turn the ornament so the opening faces inward. Hot glue ornaments around the edge of the cauldron. Then add layers of ornaments to create the illusion that the cauldrons are bubbling over.
Don’t be stingy with your hot glue or the ornaments won’t stay in place!
Final Details
Once your bubbles are in place, add moss haphazardly around the cauldron brim. I used two different types of fake moss, but you could stick with one for a similar effect.
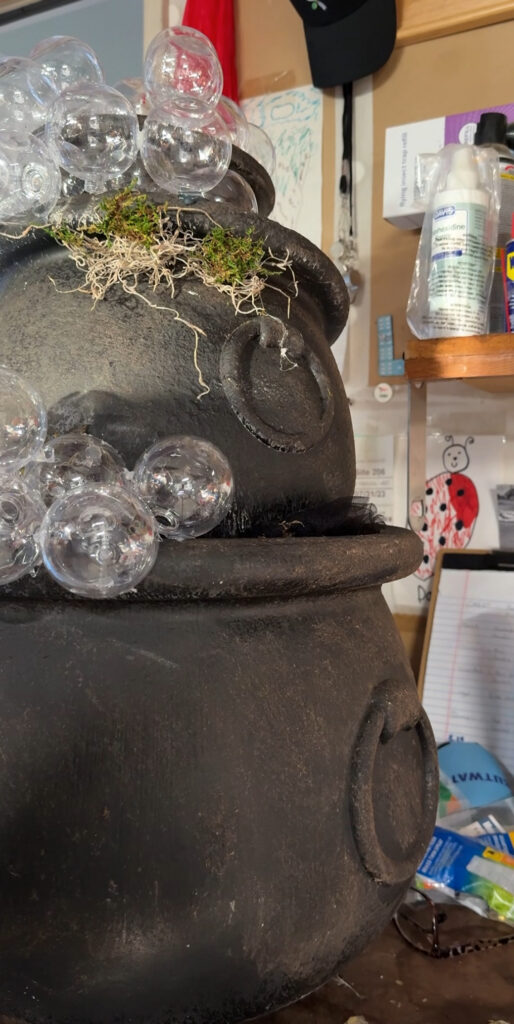
Lights would be a fun addition for an extra effect at night. I recommend battery-operated lights so you don’t have a cord coming out of the cauldron.
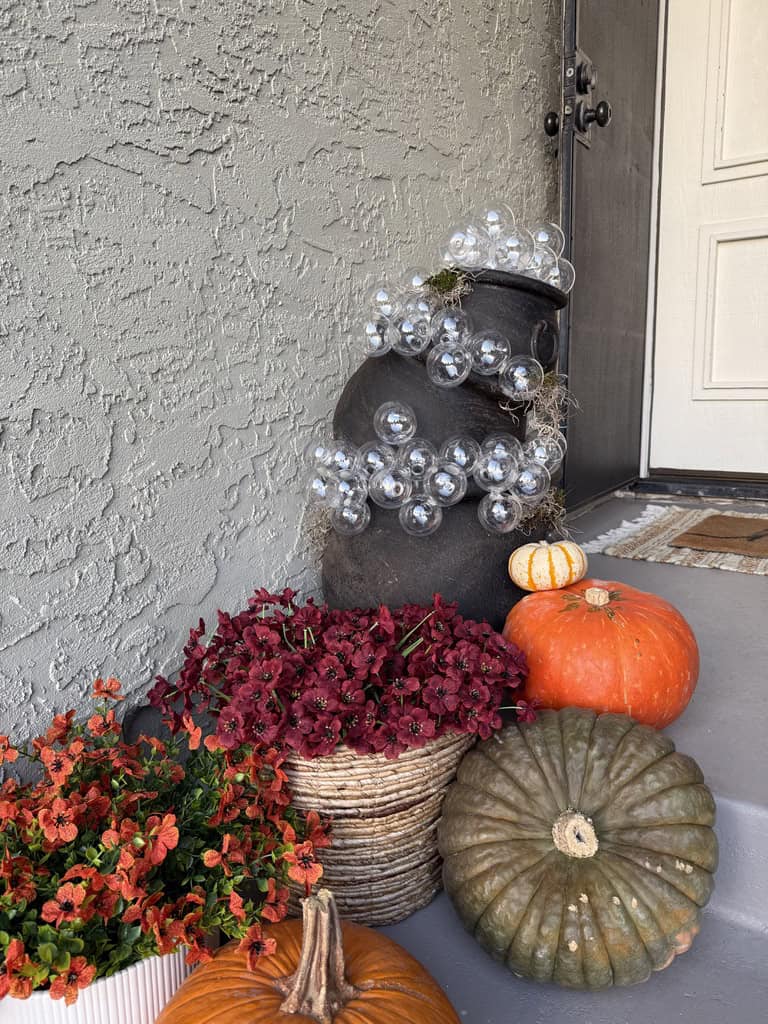
This is an easy project that doesn’t take too much skill, just patience as you hot glue all those ornaments!
If you’re looking for another easy Halloween craft, check out my DIY Pumpkin Fairy House!
Note: This post contains affiliate links, which means I earn a small commission at no extra cost to the consumer.